Mehackit is a social business leveraging and contributing to open source technologies and their creative use for teaching and learning.
Mehackit offers free online art and technology courses, professional development training in phenomenon-based teaching of creative technology, and participatory workshops for museums and events.
When you’re happy with your track you might want to save the track as an audio file and share it with your friends online (for example, on your SoundCloud page). First, you’ll need to record your song by using the record function in Sonic Pi.
The recording process is simply following:
Click the Rec button and it should highlight
Now that record is toggled on start your song by clicking Run
Once your song is finished (or you’ve played enough of your live_loops) click Stop
Finally, click Rec again to stop the recording
Save your audio file in the dialog window (for example, with a name MySong.wav)
Once you have your audio file saved you are ready to play and share it. However, we recommend you to process your audio file a little bit to make it sound more professional and louder. For this, we are going to use Audacity which is a free, open-source software for recording and Editing sounds. You can download Audacity (for Windows, Linux and OS X) from here: http://www.audacityteam.org/download/.
Audacity: Removing Silence
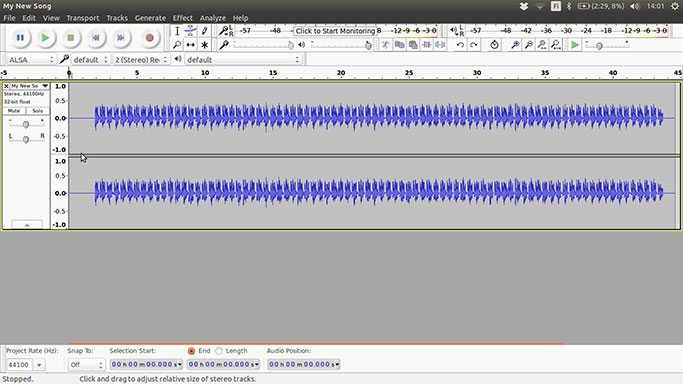
Usually when you record audio with Sonic Pi there will be some extra silence in the beginning and the end of the song. If you want, you can remove this unwanted silence with few simple steps. First, open your audio file in Audacity from the menu “File / Open”. Once you have opened the file you should see a view like the one below.
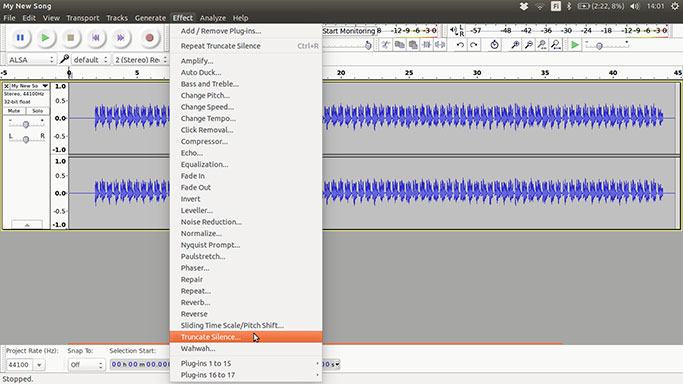
Now navigate to the “Effect” menu and select “Truncate Silence”.
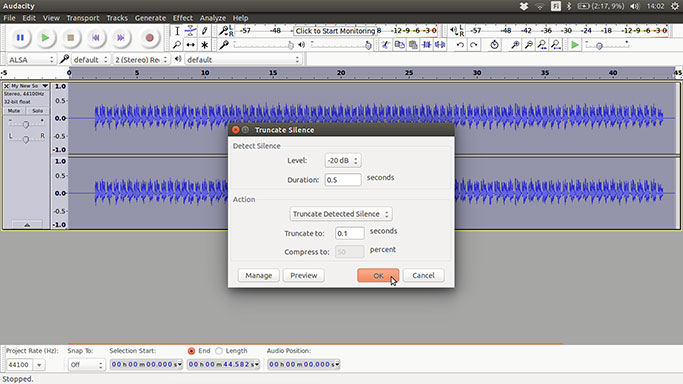
Use the following values in the “Truncate Silence” window:
Level: -60 dB
Duration: 0.5 seconds
Truncate to: 0.1 seconds
Next, click “Ok”.
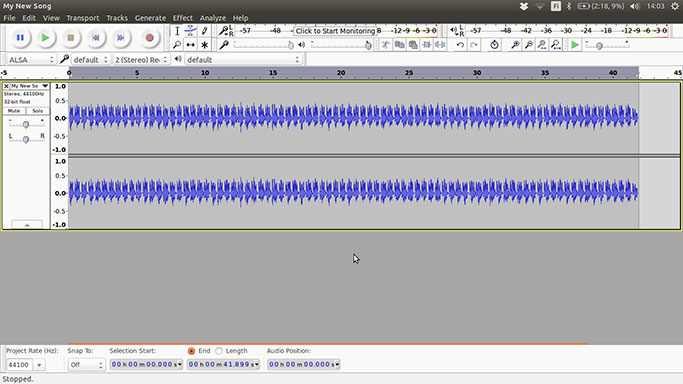
Now you should see the silent parts of the audio removed from the waveform.
Audacity: Normalizing loudness
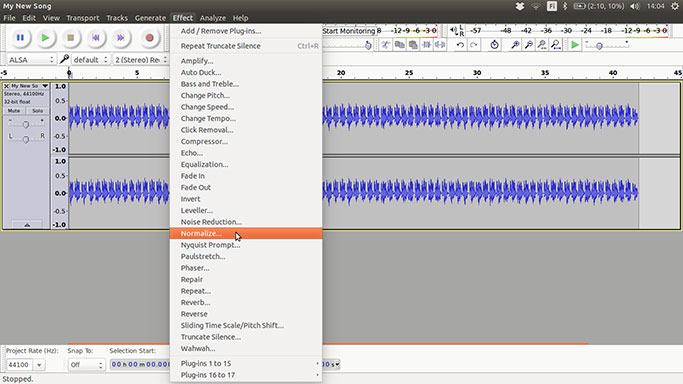
Next, let’s make the audio as loud as possible without compressing or doing any damage to the audio itself. If you feel like your music is more beat-driven and should overall be louder, then this next step is for you. On the other hand, if your material is more subtle (like ambient music) and should remain like that, then we don’t necessarily recommend you to take the following steps for normalizing the audio. Anyway, here’s how you do it: Go to the “Effect” menu and select “Normalize”.
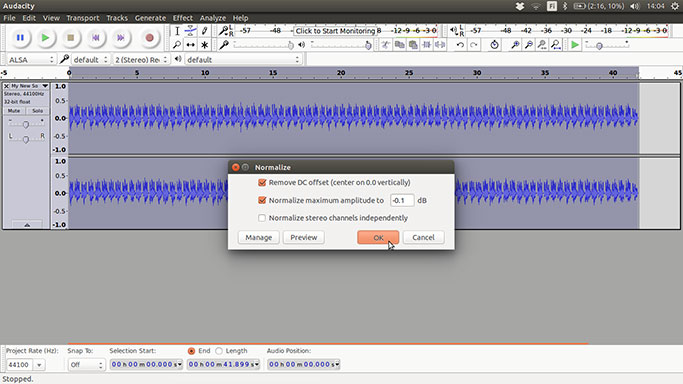
Set the following value in the “Normalize” window:
Normalize maximum amplitude” to -0.1 dB
Check the two topmost checkboxes and click “Ok”.
Now you should see that the spikes in the waveform are taller which means that the resulting audio is louder as well.
Audacity: Saving an MP3 file
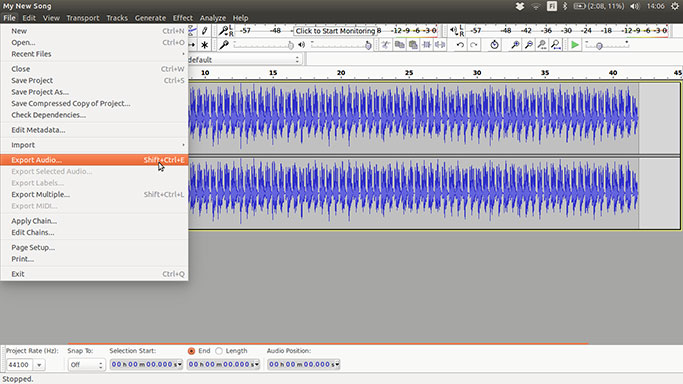
Now you’ll just need to save the audio file. For example, if you want to save your track as an MP3 file, open the “File” menu and select “Export Audio”.
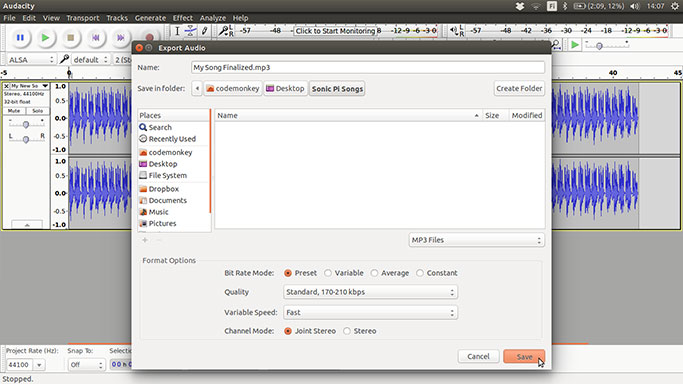
In the Export Audio window you should see a pull-down menu somewhere around the file browser. Select “MP3 Files” from that menu. You can use one of the of standard presets in the Format Options for the MP3 file. For example, the following Format Options should always work decently:
Bit Rate Mode: Preset
Quality: Standard, 170-210 kbps
Variable Speed: Fast
Channel Mode: Joint Stereo
Next you’ll need to enter the filename to the field “Name” and click “Save”. That should do the trick! Now you have the MP3 file of your track, which you can easily send to your friends, post on SoundCloud or upload to your mobile phone.
We hope you’ll have fun creating and publishing tracks with Sonic Pi!